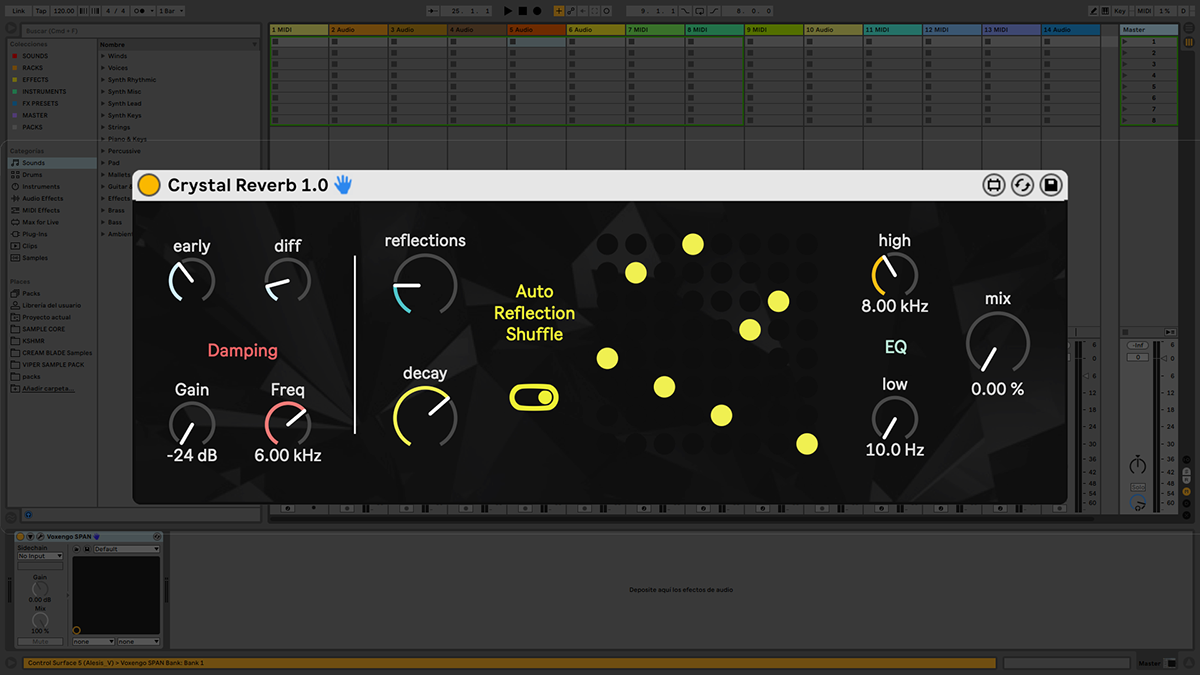
Crystal Reverb is a reverberation module which offers a clean creative process. Play with the main macros (reflections and decay) to add echo density to your sound and decay time and mess around with the matrix to add shuffling or stack your echoes. You can add as many as you want, edit the matrix or let the audio input signal dictates the randomization of echoes around the space automatically. It is based in MAX and specially designed to work in Max for Live, inside Ableton Live.
You can get it on Gumroad:
Dev Notes
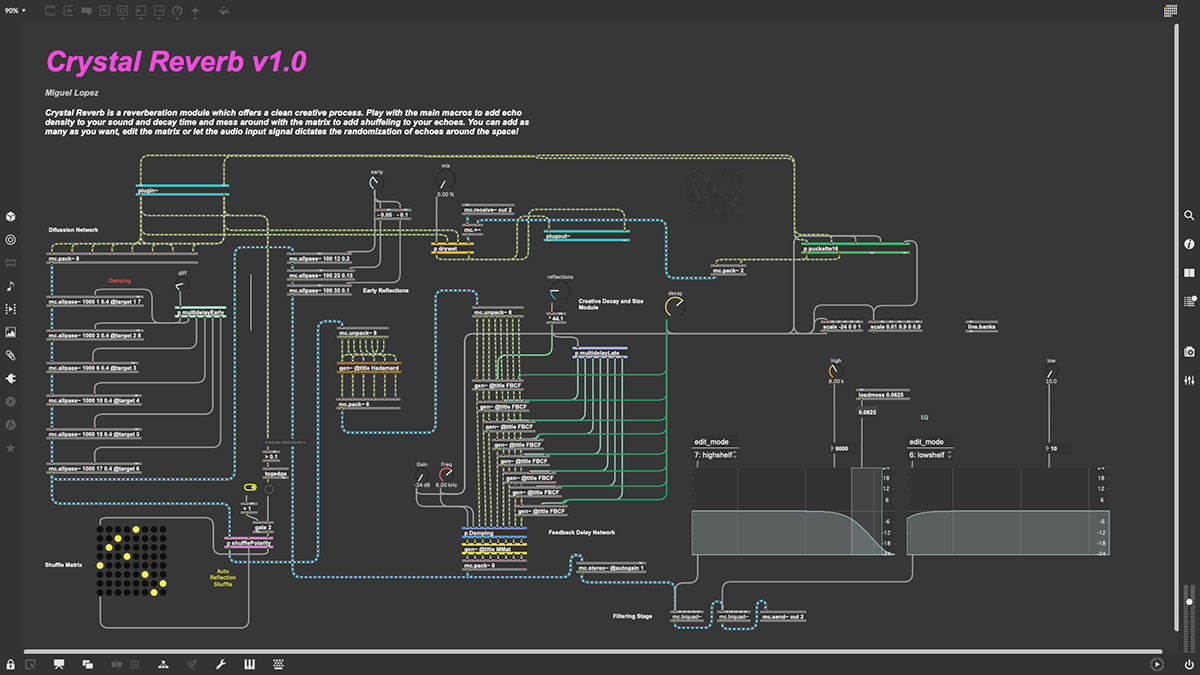
We can differentiate two clearly different stages, the diffusion stage and the FDN (feedback delay network), where the creative knobs come in.
We are using the .mc~ utilities from Max to get 8 different signals into a single wire, so we can have a multi delay channel that is mixed into a stereo signal at the end of the process.

For the diffusion, I only used a series of Schroeder AllPass filters following one way from the input, and another path with a Puckette algorithm for a diffused and ambient messy reflection zone at the beginning of the sound. The AllPass filters don't change the frequency response from the signal, but they alter the phase in a messy way, and has a feedback delay, so it can turn a sound into a micro-echo'ed signal.


Then, the signal from the Schroeder stage duplicates and splits into two sections: one goes to the Early Reflection Zone, where some more echoes are implemented and go directly to the output. The other path goes straight to the shuffling and polarity random inversion matrix and then into the mixing matrix and straight to the FDN for the reverb tail to happen there.


The rows and the columns in the shuffle matrix represent the input and output signal echo from 1st to 8th channel. In that case, the echo from the channel 1 goes to channel 5, the echo from channel 2 goes to channel 3... In the yellow switch you can select if the echo shuffling is made manually by the user or automatically with signal input level reaction. The fun is that, you shouldn't, but you can add as many cross echoes as you want tho (I didn't mean that, shh...).

In the second stage, the FDN, the signal goes through a bunch of parallel of gen~ objects containing a series of simple sample delays which delay times are controlled by a macro that then return with a feeback gain to the network to add echoes and more echoes. Then they are added to a Householder mixing matrix to swap channels, similar to the mixing matrix in the diffusion process. Note that the mixing matrix are orthogonal, meaning they conserve the energy between the input and the output, so the reverb doesn't go crazy with the reflections in any moment.


Note the signal goes through a Damping sub routine right before being mixed in the MMat object (the Householder Matrix), so we can cut some highs that do not sound real in a reverb simulation (highs are being absorbed by surfaces faster than low frequencies).
At the end of the process, we have a classic low-cut and high-cut filtering stage for the user. Have a look at the damping and filtering stage:


To finish, have a look at the complete structure of the code:
References
Free Reverb algorithm patches from Tom Erbe

